
Last Updated on November 9, 2020 by Joy Editors
Enhance your friends’ and families’ excitement at receiving your wedding Save the Dates by sprinkling some extra love and creativity into them.
DIY Save the Dates not only show how much you care about the recipients sharing your big day with you, but they can help you step out of the haze of wedding planning and get crafty.
While there’s no limit to what you can do with your Save the Date cards, we’ve pulled together some ideas to get your imagination flowing.
Note: Many of the following ideas will be easier with a paper trimmer.
Calligraphy Creations
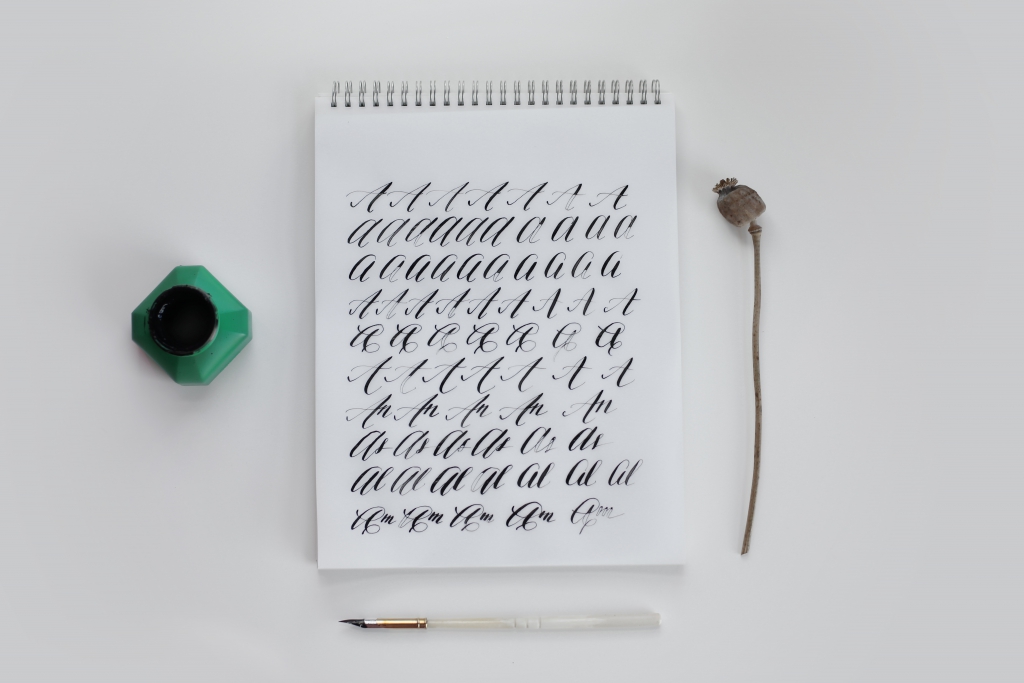
For romantic- or whimsical-themed weddings, use the fine art of calligraphy to craft elegant Save the Dates.
First, head to a craft store to purchase a few calligraphy pens and enough paper for your cards. We recommend going to an actual store, instead of ordering online, as craft store employees can help you find the right pens and paper for your unique skill level.
Before you move to card creation, spend a few hours watching calligraphy tutorials and practicing until you get your skill to a place where you feel ready to share it with your Save the Date recipients.
Inflated Save the Date

If you and your fiancé have strong lungs, buy a bundle of balloons and take turns having one person blow up a balloon and pinch it closed (Don’t tie it!) while the other uses a sharpie to write your Save the Date deets on it.
Then, deflate the balloon, put it in an envelope with a note instructing the recipient to blow it up for a special message, then breathe and repeat.
Chalk Paper Fun

If you’re hoping to create a cheerful, lighthearted mood, transport your potential wedding guests back to the wonder years of childhood by creating chalkboard Save the Dates.
To create your own chalk paper Save the Dates:
- Purchase chalkboard contact paper, liquid chalk markers, card stock, and acrylic sealer.
- On a piece of paper, work out what type of handwriting you want to use and any images you want to include. For this type of card, laidback writing is often best, so don’t stress too much about your handwriting. Do a few practice runs before you move to the chalk paper and markers.
- Now, decide on the dimension you want the cards to be, and using the nifty graph on the back of the chalkboard contact paper, and the aforementioned paper trimmer, cut out your cards.
- Next, cut out an identically-sized piece of card stock for each piece of chalk paper, and adhere the chalk paper to the card stock.
From there, get out the chalk markers and start creating your masterpieces. And if you mess up, no worries. Just use a damp cloth to remove your mistake. When the card is just right, go outside and spray on one layer of acrylic sealer.
Origami Love
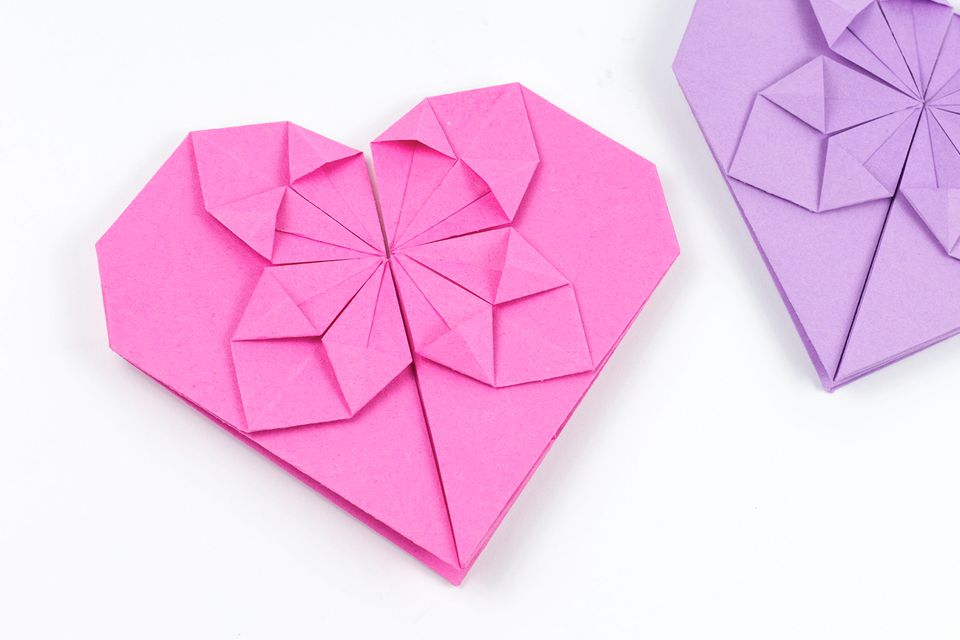
Honor the universal symbol of love by taking the time to fold delicate pieces of paper into a heart.
First, purchase origami paper you can write on. Then, write your wedding date and location on the white sides of the origami paper, find instructions for a flat origami heart, get to folding, and write “Open Me” on the exterior of your final creations.
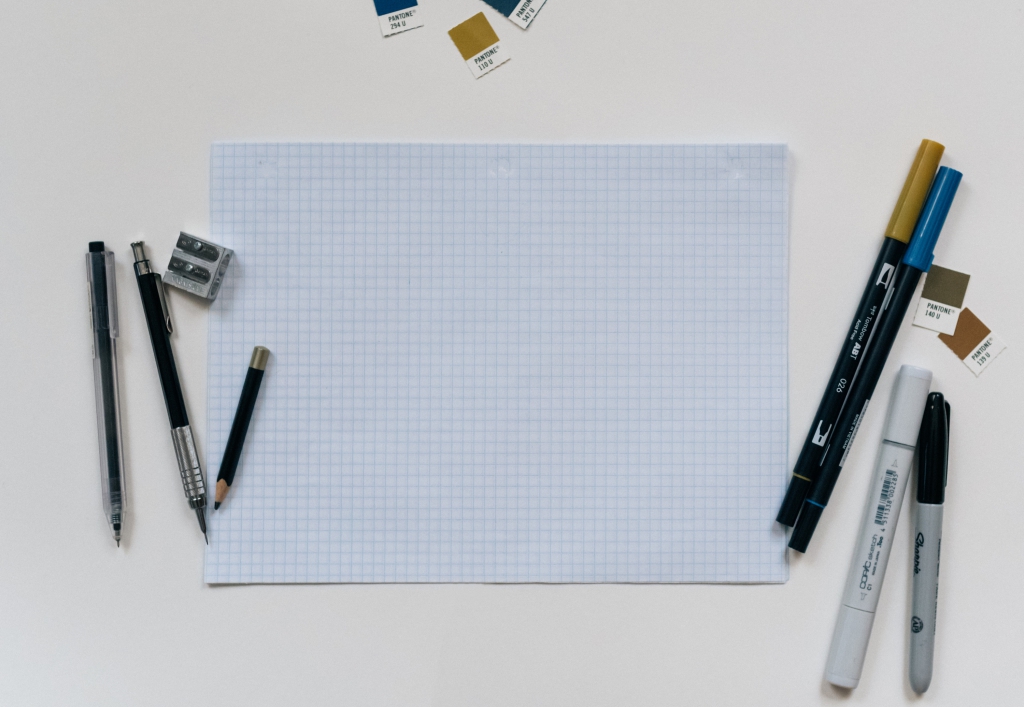
Graph Paper Message
This quirky DIY Save the Date idea exudes the message of “we’re building a new life together and want you to join us for the celebration.”
T0 make your own:
- First, purchase 11” x 8.5” graph paper and the pens or colored pencils you’d like to use for writing and drawing (optional).
- Do a few trial runs, trying out the handwritten font and any extras you want on the cards. It can be fun to embellish the paper with a few architectural sketches and easy to utilize block handwriting that matches the theme. To help your writing and images stay in line with the precise vibe of the paper, use a measuring stick as you work your DIY magic.
- Finally, use a paper trimmer to cut each sheet of graph paper in half, then go to town crafting your custom-made cards.
Magnetic Save the Dates
We’re sad to say that many Save the Dates end up in the recycling bin after the relevant information has been recorded. However, creating magnetic Save the Dates inspires folks to hold on to the cards, as all they have to do is stick it on the fridge.
To make your own Save the Date magnets:
- First purchase self-adhesive magnet squares, two colors of card stock and scrapbook adhesive, or a glue stick.
- Next, decide if you’d like to print your Save the Date verbiage and design or do it by hand. If using the computer, create two to three identical Save the Dates on one document by either creating two Save the Dates on an 8.5″ x 11″ document, one on top of the other, or flipping the document to landscape to create cards that are more rectangular than square.
- For smaller, rectangular cards, paste the verbiage and design of your Save the Date three times on an 8.5″ x 11″ oriented document.
- Now, print your desired number of invites on one color of card stock, then use a paper trimmer to evenly cut them out, making sure they’re all around the same dimensions.
- If you’re handwriting the cards, skip all the printing and head straight to cutting out evenly-dimensioned pieces of card stock and writing the relevant information on each.
- From there, cut out the second color of card stock in the same dimensions as the cards, plus 1-to-3 centimeters on each side. For example, if the Save the Date is 8.5″ x 5.5″ (aka 22 centimeters x 14 centimeters) and you want 3 centimeters of the second color to appear behind the first, cut out card stock that is 25 centimeters x 17 centimeters.
- Glue the printed (or handwritten!) Save the Date to a piece of the larger card stock and stick a magnet square on each corner of the back of the final card.
Tip: You can make almost any of the Save the Dates on this list magnetic with the nifty self-adhesive magnet squares.
Embroidered Handkerchiefs

If you’re having a super intimate wedding (say, under 10 people), and you’re a whiz at embroidering, sew your Save the Dates into handkerchiefs.
Then, send them off to your nearest and dearest who will undoubtedly need those hankies as you say your I dos.
Stamp, Seal, Deliver

If you don’t trust your handwriting or drawing skills, stamps are an excellent way to create DIY Save the Dates that have that special, customized essence.
To create your own:
Purchase rubber alphabet stamps in two fonts (one for the headline and one for smaller wording), stamps you might want to use that depict a design or image, stamp ink, and card stock from a local craft store.
As we noted above, it’s best—especially if you’re not a DIY pro—to purchase these products from a craft store so a professional can direct you to the ideal combo of products.
Now, use a regular piece of paper to practice crafting your cards and how much space you’ll need for all the information and extras. Then, use a paper trimmer to cut your card stock into the needed size and stamp out your Save the Dates.
Polaroid Fun
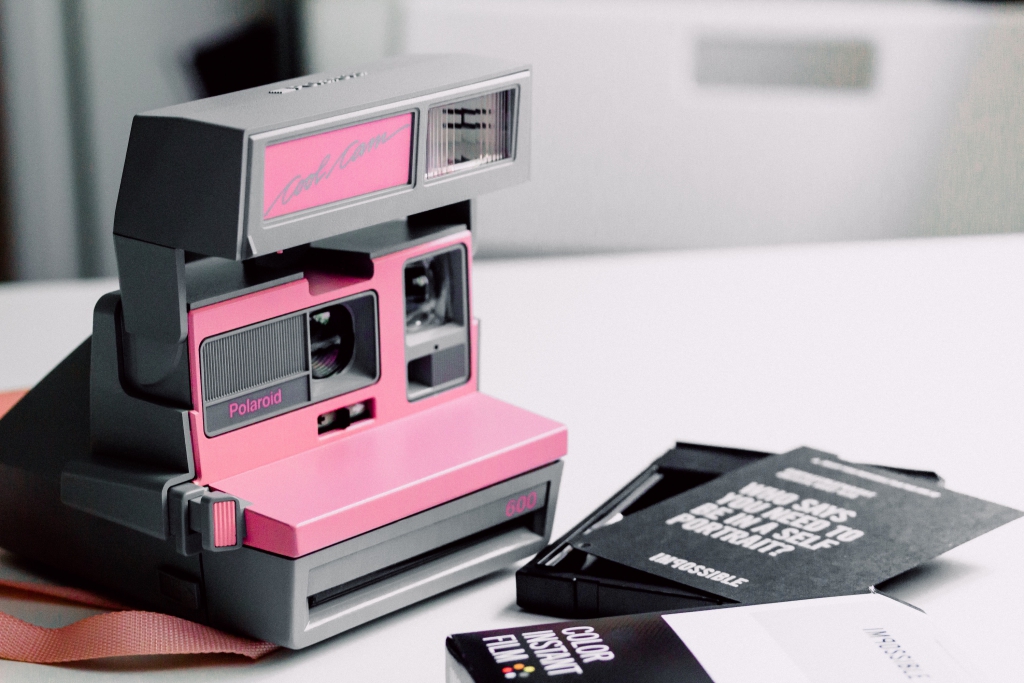
Let your personality shine through your Save the Dates by sending a Polaroid card.
Use a letter board to write your Save the Date message, then have someone take a Polaroid of you and your honey holding up the board.
Personalize each photo by thinking about the facial expressions, positioning, or props that will make each Polaroid recipient laugh or say “aw,” then take a customized photo for each.
Sticker It Up
If you’re not into stamps, but also don’t want the entirety of your Save the Dates to be composed of your handwriting and drawings, consider using stickers to add consistent flair to your cards.
Purchase card stock, alphabet stickers, and stickers for embellishment—flower stickers, for example. Then, use a paper trimmer to cut the card stock into the desired dimensions and start sticker-ing!
Tip: As it can get expensive to write all Save the Date details in stickers, consider only using them for the “Save the Date” headline and then printing or handwriting the rest.
Eco-Friendly Seed Embedded Cards
To ensure your Save the Dates live on, and are kind to Mother Nature, you can do the stamp idea from above on seed embedded paper or simply use an inkjet printer.
If you go the stamp route, make sure you use unmounted stamps so you can press the letter or image onto the paper with your finger, as the paper can be a bit uneven.
Next, make sure the seed paper doesn’t end up in the trash by listing simple instructions for how to use the seed paper.
For example, “You’re reading this on plantable paper! To use, just place a portion of the paper over a pot filled 2/3 with soil, cover the paper with 1/8 inch of soil, water it and give it sun, then see what happens.”
If you want to go all out, send the Save the Date with a small pot.
Film It!
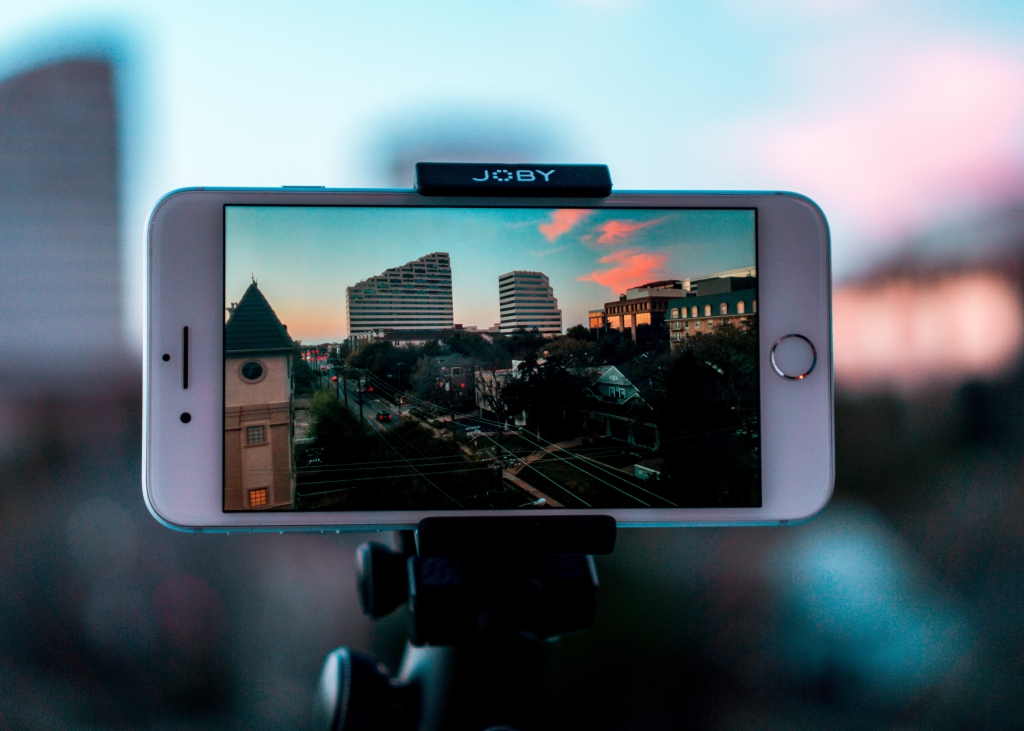
Bypass snail mail by emailing your hopeful wedding guests a short Save the Date video.
You can make it a film noir-style mystery flick that ends in revealing the date and location of where you’ll tie the knot, craft a video that’s a collage of photos and videos of your romance, create a simple video showing your sweet faces offering up the information before you seal it with a kiss, or produce anything else that interests you.
There aren’t really any parameters for the video other than clearly providing your Save the Date information at the end.
And just to be safe, include the details in the body of the email as well.
Luggage Tags
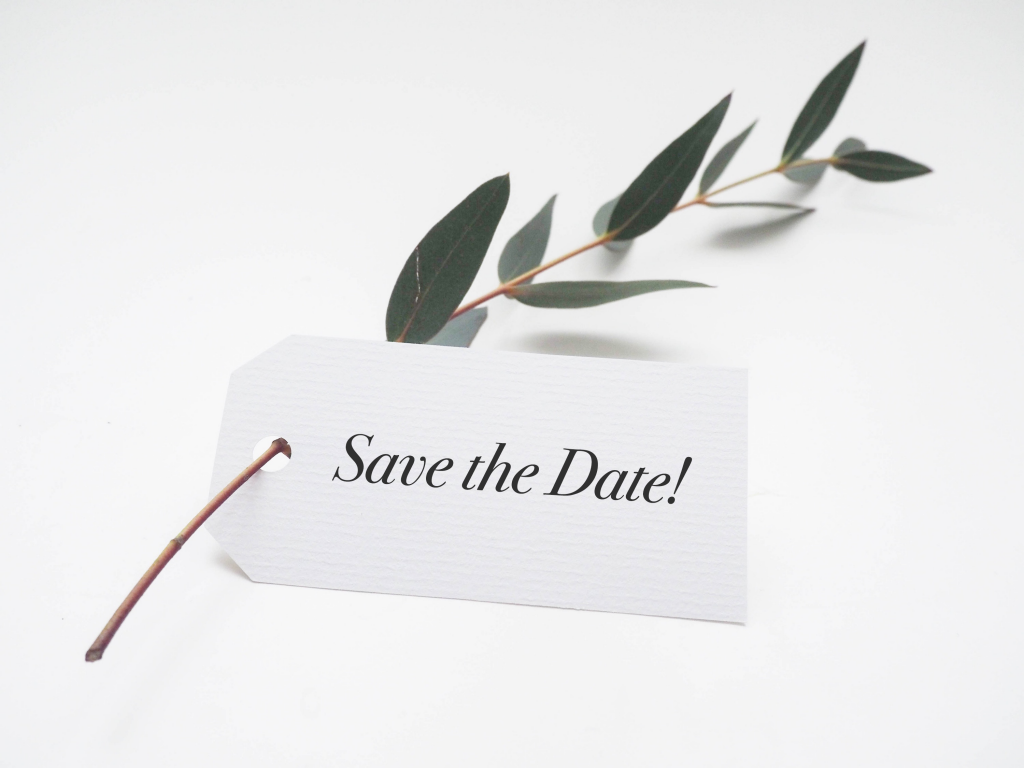
Amp up the excitement for a destination wedding by writing your Save the Dates on paper luggage tags, which you can buy in bundles online.
If it’s hard to fit all the information on the tag, create a larger Save the Date using one of the suggestions above and drop the luggage tag in the envelope after giving it some themed embellishments.
For example, if you’re using calligraphy for your Save the Dates, create a customized note on one side of the tag or do the classic “(Your name) + (Your fiancé’s name).”
Map It Out
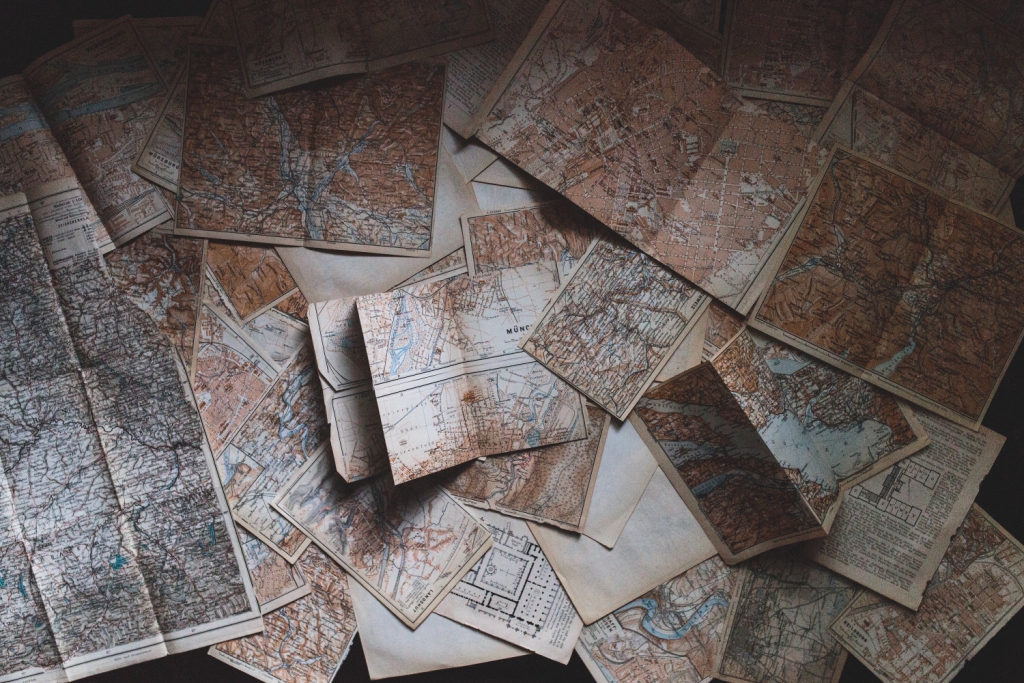
Another idea for destination wedding DIY Save the Dates is to print, purchase, or—if you’re really artsy—draw maps of the world or geographical region your wedding will take place, and put an X on the special spot where you’ll pledge your love.
On the other side, calligraphy, print, stamp, sticker, or simply write the details of your wedding day.
Pair with free digital Save the Dates
No matter how you choose to DIY your Save the Dates, pairing them with an online version is the most convenient way to let guests know about your wedding website and allow them to RSVP online once your wedding invitations have been sent.